Editing ERP Integration Settings
The My Connections tab allows you to add, edit, and delete any ERP integration. Additionally, you can add, edit, and delete the Data Type and cron of an existing integration.
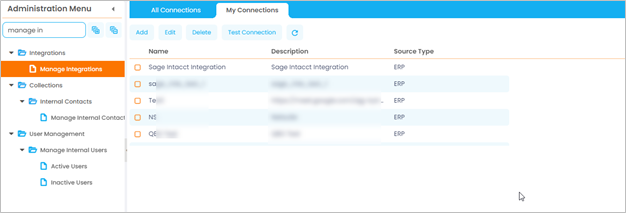
Navigate to Administration Menu > Integrations > Manage Integrations > My Connections.
Refer to the following table for more details on the buttons displayed in the grid and their functionalities.
|
Button |
Description |
| Add |
Click this button to add a new ERP integration. Refer to the following sections for more details: |
| Edit | Select an integration from the grid and click this button to change the Integration details of the ERP as required. |
| Delete |
|
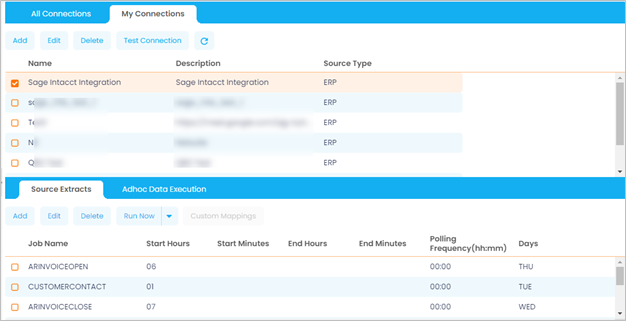
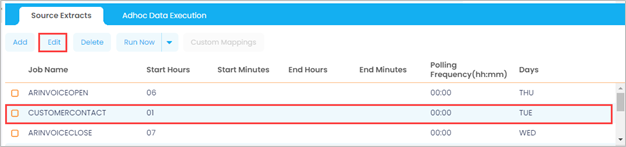
To edit the Data Type or add an Integration job of a specific ERP, select it in the grid.
The Source Extract subtab is displayed in the bottom panel of the grid.
Adding Data Type and Integration Job
To add a Data Type or Integration job for the ERP, follow these steps:
-
Click Add on the toolbar.
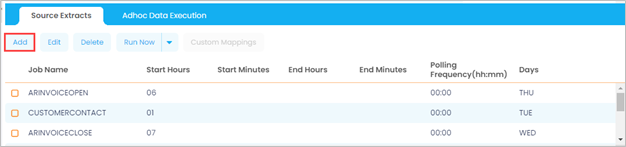
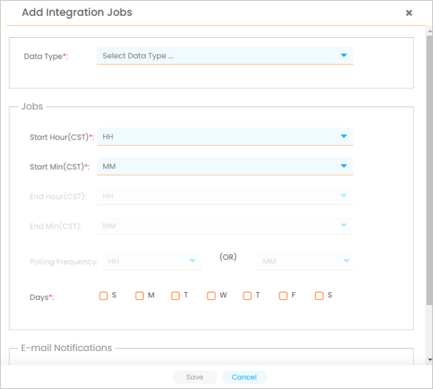
The Add Integration Jobs window is displayed.
-
Select the Data Type from the drop-down list.
-
Provide cron details to run the integration job.
-
Provide E-mail Address to be notified about the status of the job execution status.
-
Click Save to submit the details or Cancel to exit the window without saving the changes.
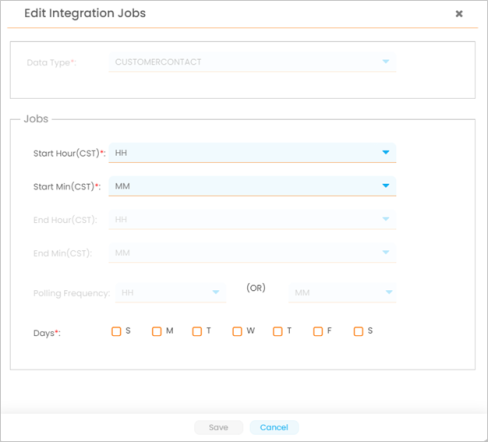
Editing Integration Job
To edit the Integration job for the ERP, follow these steps:
-
Select a record from the grid and click Edit on the toolbar.
The Edit Integration Jobs window is displayed.
-
Edit the integration cron as required.
-
Click Save to submit or Cancel to exit the window without saving the changes.
|
|
Actions that can be performed
|
